 After writing an epic Lighting 101 Guide for the Everygirl (coming out shortly! have you seen my other posts??), and tackling all the lighting at once for Lady Laurier, I feel like I have been surrounded in sconces, chandeliers and pendants. And I am NOT complaining. Lighting design is one of my favourite aspects about working in this industry. I know you’ve heard people say lighting is the jewelry of the room, but really it’s so much more than that. For me, the right fixture can inspire an entire space or act as the main feature. Not to mention that without lighting you wouldn’t have a room to see at all!
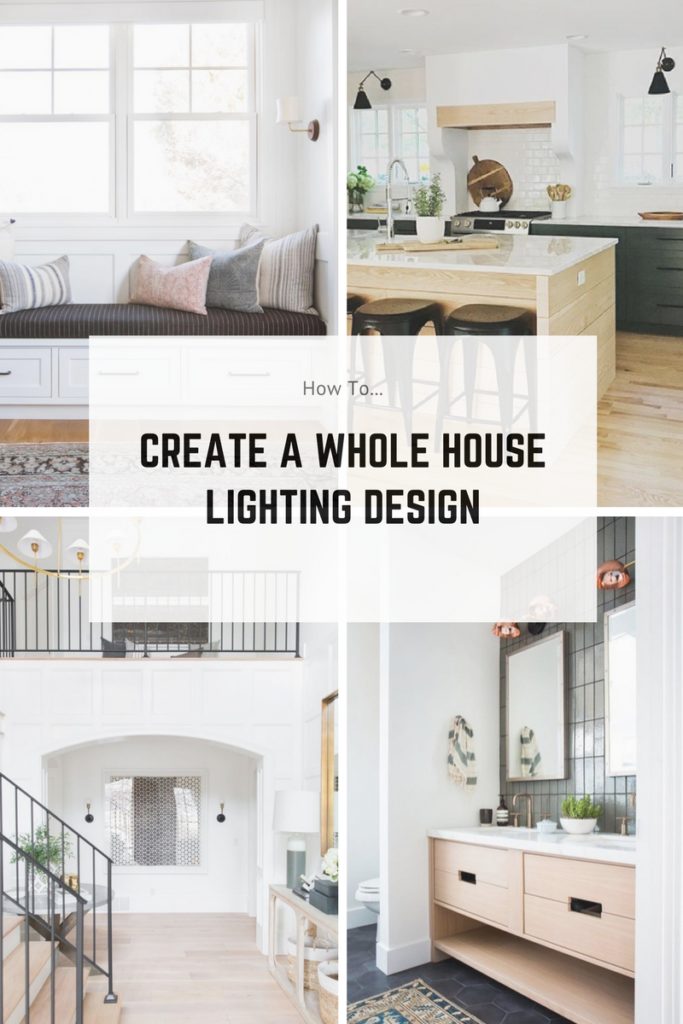
Anyways, pulling together the lighting scheme for a room, let alone an entire house, can be really overwhelming. You might like the pieces individually but then you question if they really go together. Can you mix styles? Finishes? What about layout?? Eeeek! There’s a reason there is a whole industry that focuses solely on lighting – because it’s intense! Now, you may not be tackling an entire home (or maybe you are – lucky!) but I thought I would create a small guide to help anyone create a whole house lighting design, using the lovely Lady Laurier as our inspiration. And my hopes are that these tips could also apply even if you’re simply changing one room.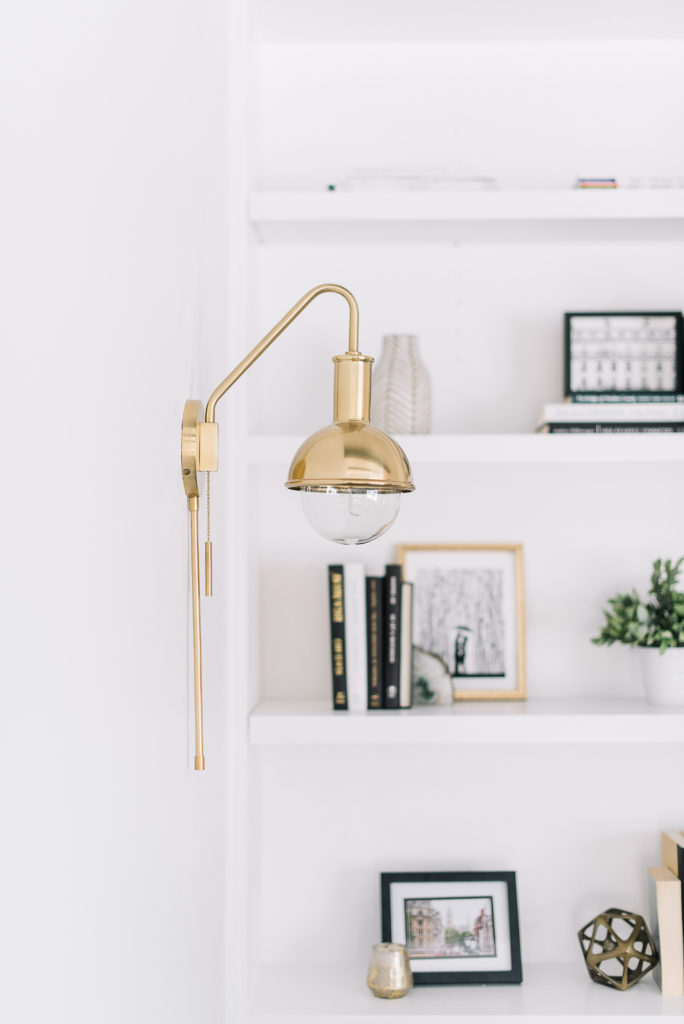
BUT…before we get into the good stuff, a few overall tips:
- don’t leave lighting to the end of the your project – it deserves attention from the start
- try to put light where it’s really needed and lower general levels elsewhere
- overhead lighting is not sufficient. Aim to have 2-3 light sources in each space!
- When it comes to lighting we look at 4 different types: Ambient (soft lighting that puts out an overall ambient glow), General (can be a combo of all sources but think mainly overhead lighting), Task/Directional (lighting a particular area where a task is performed), and Accent (adding drama to a space, decorative).
Now, take a look at the lighting scheme I created for each floor of the Lady Laurier :
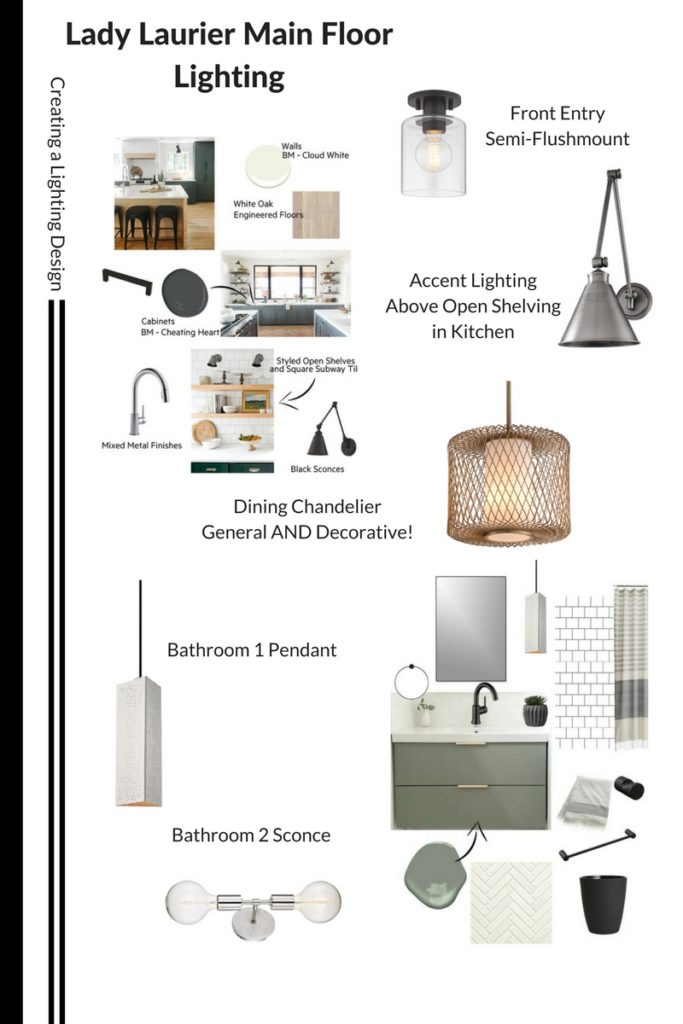
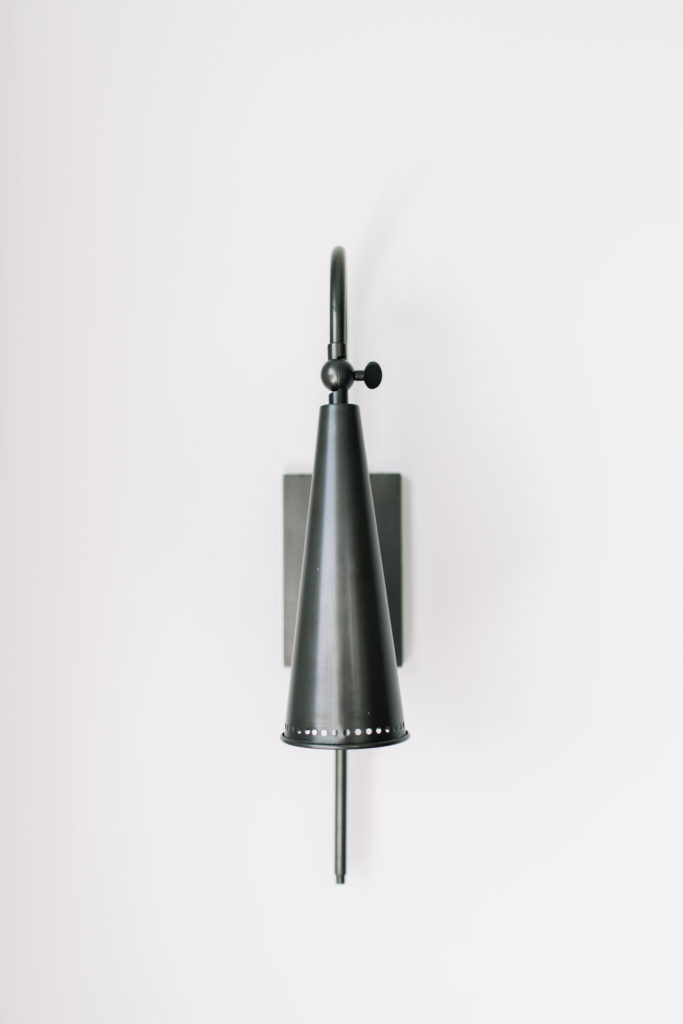
Front entry | Kitchen Wall Sconce | Dining Chandelier | Bathroom 1 Pendant | Bathroom 2 Wall Sconce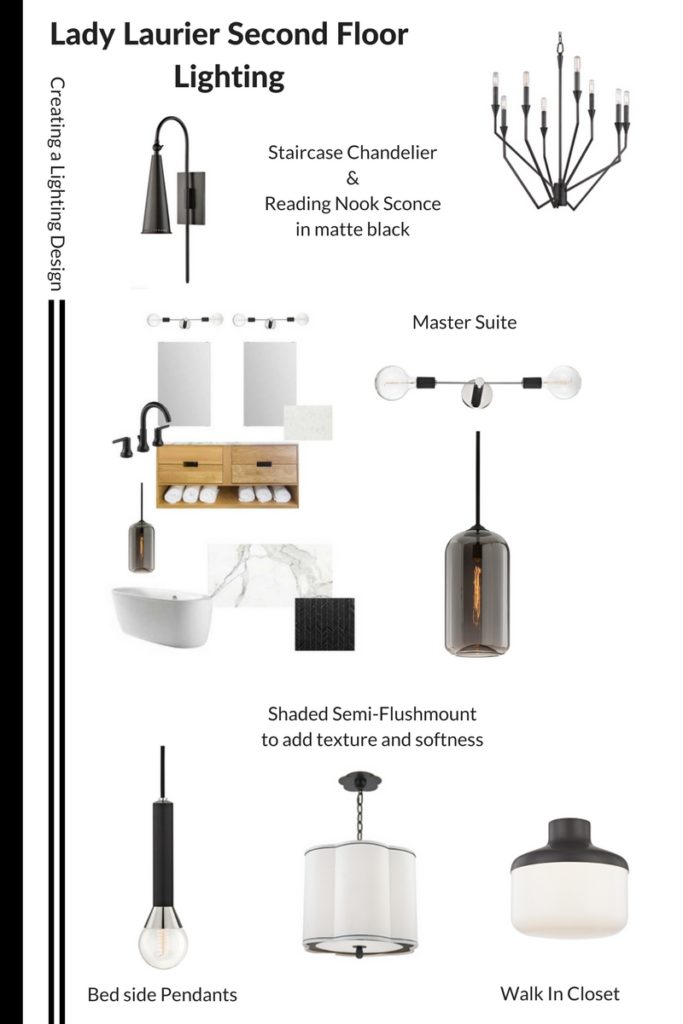
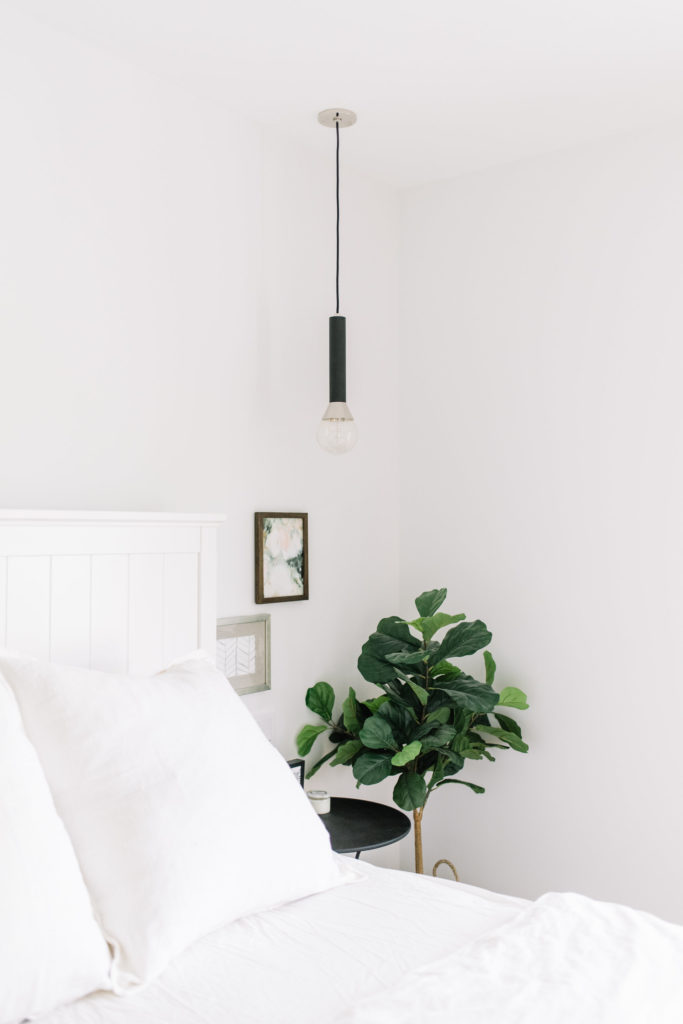
Staircase Chandelier | Reading Nook Wall Sconce | Master Vanity Light | Pendant above Tub | Bedside Pendants | Master Chandelier | Walk in Closet
I’ll speak more to the choices I made but let’s get to the steps I followed to create this lighting design…
One // Make a Lighting Map
Because we were able to build Lady Laurier with pot lights in virtually every space, I had a lot of the overhead lighting already checked off. From there, I created a floor plan or “map” so I could visualize where certain tasks would be performed and where I’d need that extra pop! I pictured where I might put some table or floor lamps, then added accent lighting (wall sconces for instance), finishing with any additional general lights like chandeliers. If you have drawings of your space, take a pen and mark it all up. Then walk around the home at different times of day and see where light is needed.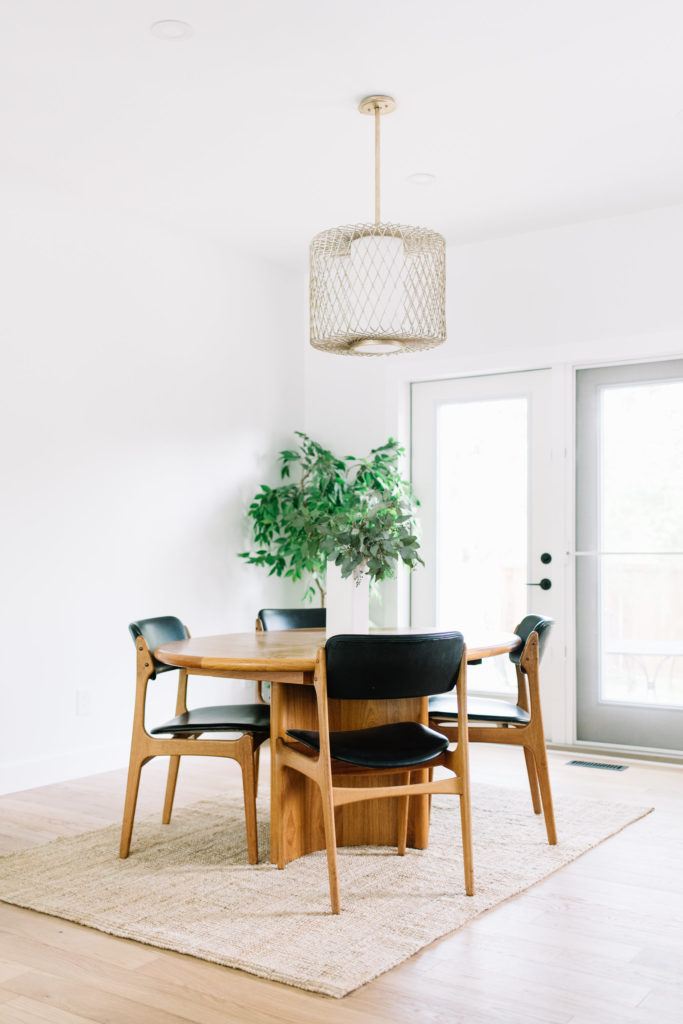
At the end of this step, you should have a set list of fixtures with their location AND size! Scale is important, so make sure to measure and consider things like ceiling height and correct amount of wattage. There’s nothing worse than a small chandelier in a huge dining room…or a single bulb vanity light as the sole fixture in a windowless bathroom!
Two // Find The Right Style
This step may be the most daunting because of the sheer amount of choice out there. But starting by breaking down your style will help. Are you all about the mid century look? Industrial? California cool? For Lady Laurier, I knew I wanted a classic look with some modern touches…and so I started there. Luckily, I connected with Hudson Valley and found a whole range of fixtures from their lines, including Mitzi (who we used on the Ottewell Oasis house) and Troy. I discovered so many incredible pieces, so sometimes shopping within one brand may even help create that lighting scheme!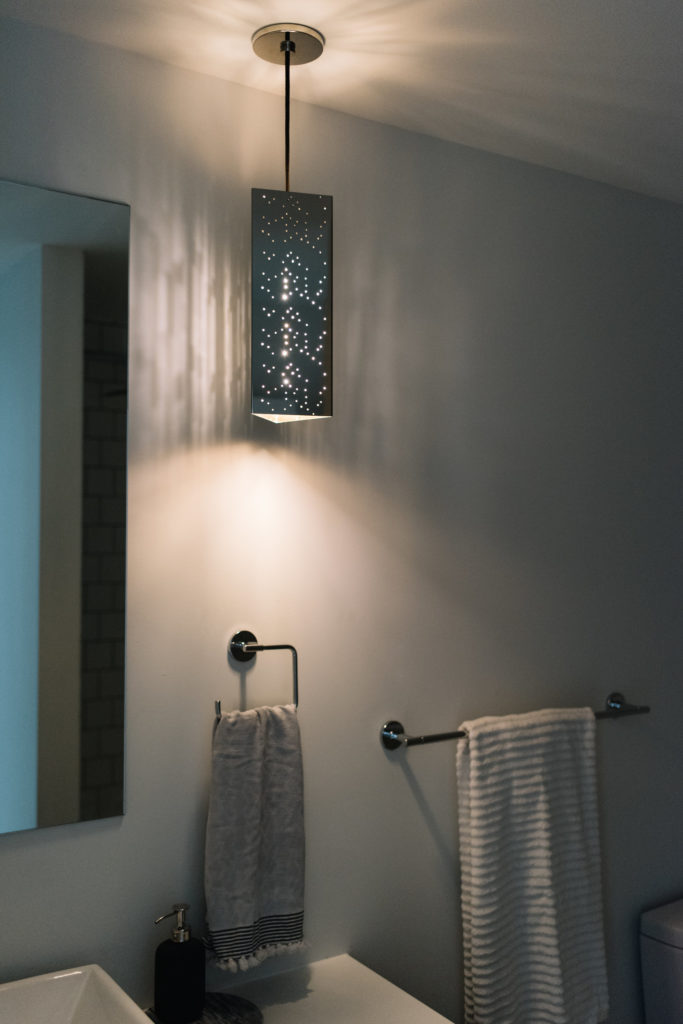
Three // Create a Cohesive Look
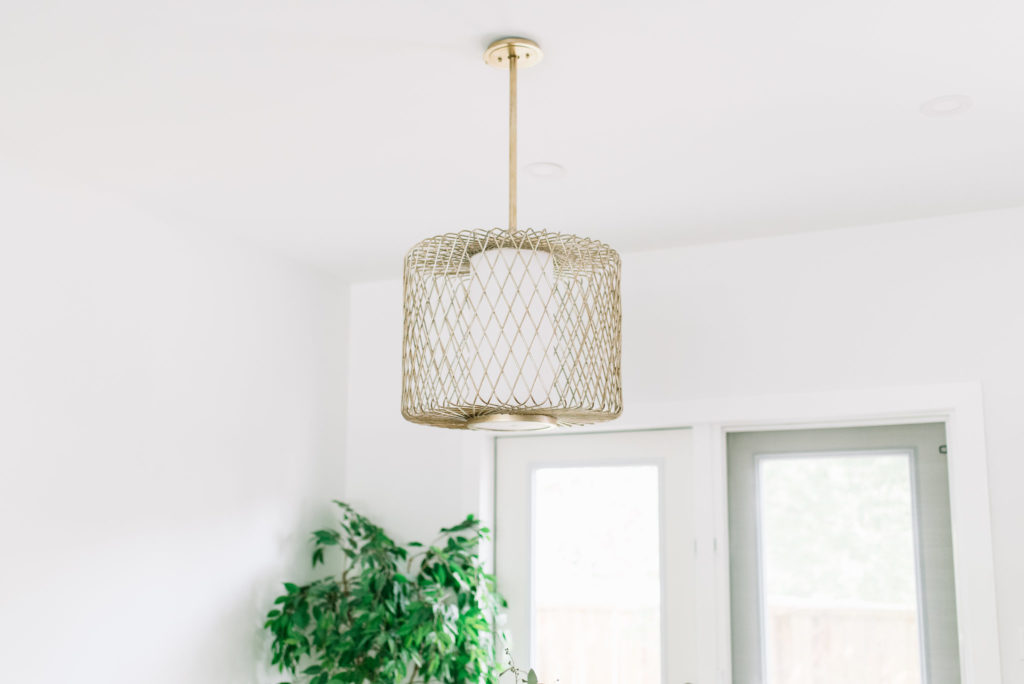
The best tip I can give you is to take screenshots of potential lights and pull them onto a blank document to see them all at once. Think about how they are working together: Do you have some mixing of metals? For Lady Laurier, I mixed a lot of black and chrome – trendy meets classic! You should aim to mix at least 2, if not 3 metals (read more on that here!). In the dining room, I allowed for one pop of brass that was meant to mimic a basketweave, which leads me to my next question…Do you include some varying textures? The bedroom pendant I chose for Lady Laurier was fabric to soften up the space! In the master bath, I added some glass to make it feel extra luxurious. Then, what unifies the pieces? It should be at least one thing – the style, the finish? I am huge believer that you DO NOT need to be matchy matchy to create a cohesive look as long as there is a common entity.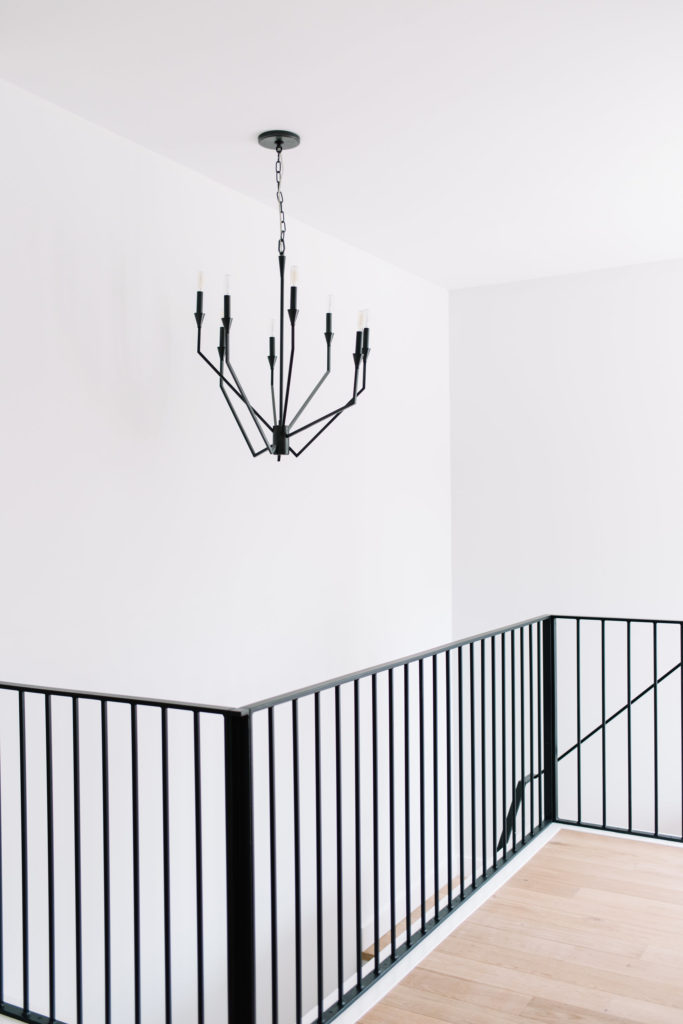


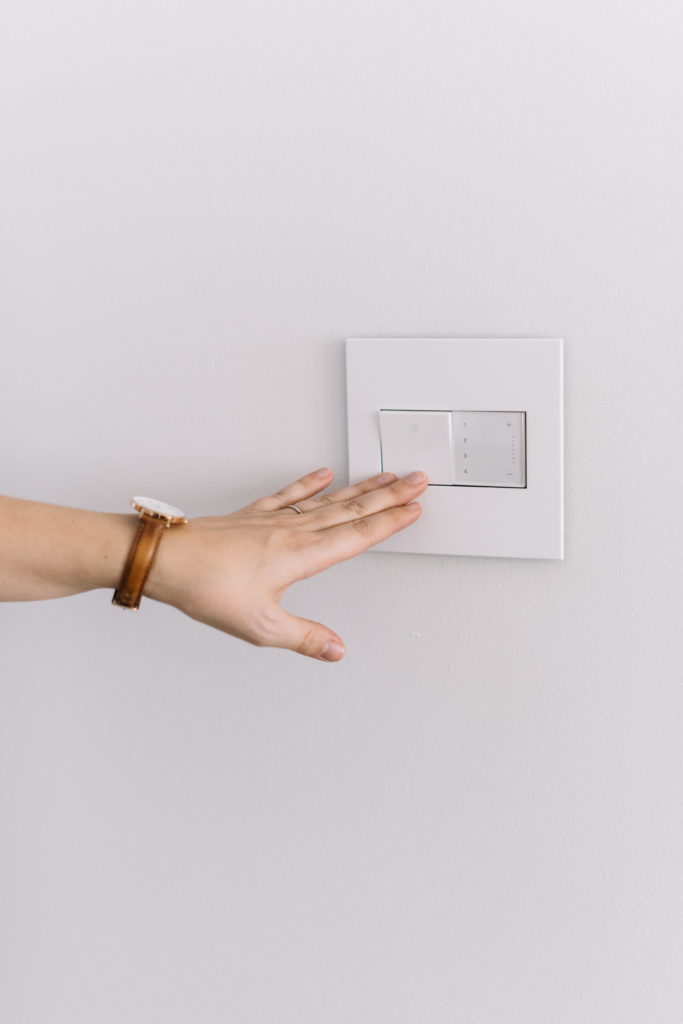
Four // Consider Your Switches
Ok, so this one is not necessarily part of the design. Unless you want to get fancy! We recently upgraded all our dimmers and switches at the Ravine House to the Adorne Collection by LeGrand and it has made a huge difference – in both looks and function. We even have some touch and wifi ready options that make me feel a lot fancier than I actually am! But in all seriousness, dimmers especially will allow you to adjust light levels and create the atmosphere you need. Who doesn’t want to feel relaxed after a busy day? Softening the light around you will play a major role in that.
So, I hope this was helpful and if you are planning a lighting revamp you feel a little more confident moving forward. If not, you can always reach out for some design assistance!!
This post was made in partnership with Hudson Valley lighting and their sister companies Mitzi and Troy Lighting. I 100% genuinely love the products we’ve installed at the Lady Laurier and would absolutely recommend!! Thanks for supporting the brands that support this little ‘ol website and the designs I am so passionate about 🙂 Stay tuned for the full home reveal soon…
Shop Some More of My Favourite Fixtures from Mitzi…(though I honestly love everything!!)
