 It’s been about a year and half since I did the spring one room challenge and revitalized our main floor bathroom…and yet, I still get asked about the floating vanity we built. Which is great!! I love that people still connect with it and want to know how we designed it. And so, I had every intention of writing a post about all the details…it just took me a little while to get to! So, thank you for being patient with me as I tried to answer your questions as best I could over direct message and what not! Now for the good stuff…a full breakdown of our DIY floating vanity! Here’s how we did it and some tips and tricks straight from the pro (my husband!).
First thing’s first – figure out your ideal size
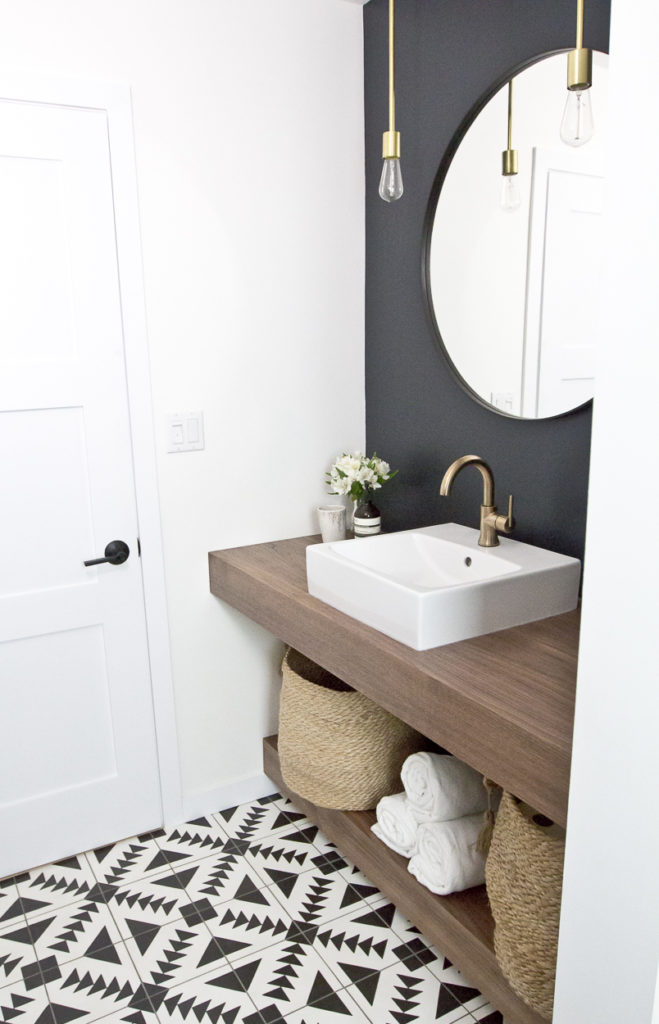
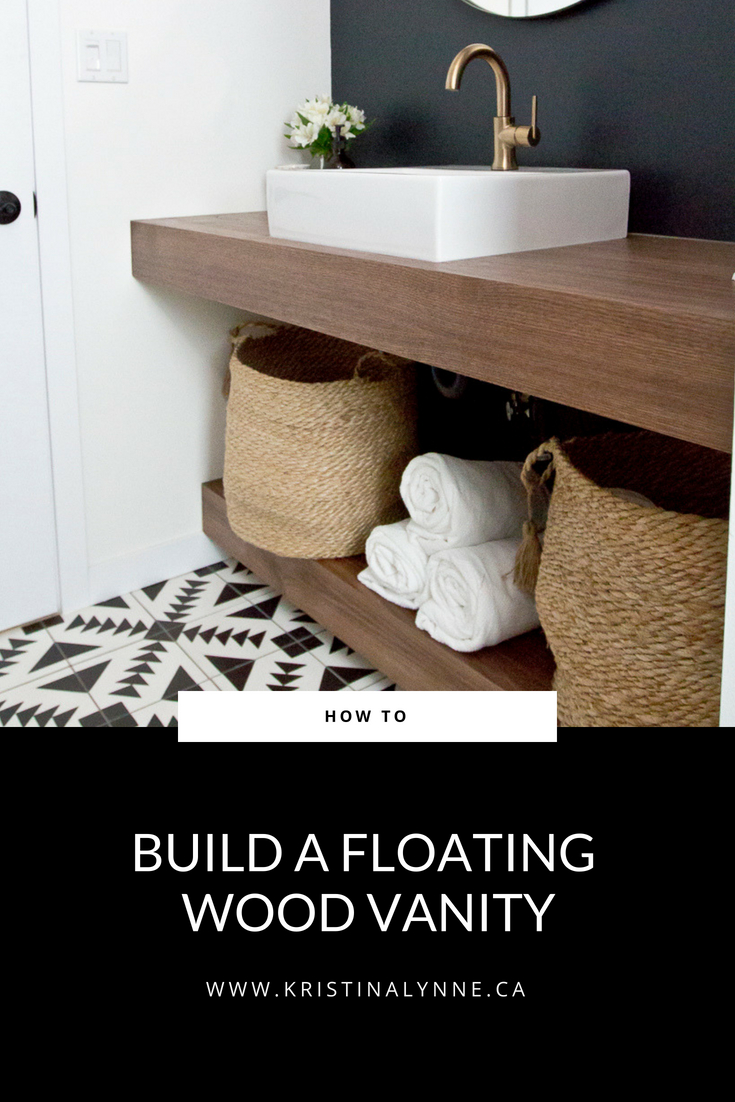
We went the full length of our nook, butting it into the corners of the wall at 55 1/2″ long. That way we didn’t have to get all fancy with the sides since the walls were there to conceal them. We did 22″ deep on the top floating section and then recessed a bit at 15 1/2″ deep on the bottom section. You do not have to do the second piece but I love having it for storage and I can better conceal the plumbing underneath with baskets and towels. Both sections are 5″ thick.
Next – build and install your frame
Once you know how big to make your vanity, create the frame first. We used regular ‘ol 2 by 4’s but you could do 2 by 2’s as well. Take a look at this guide for spacing and measurements: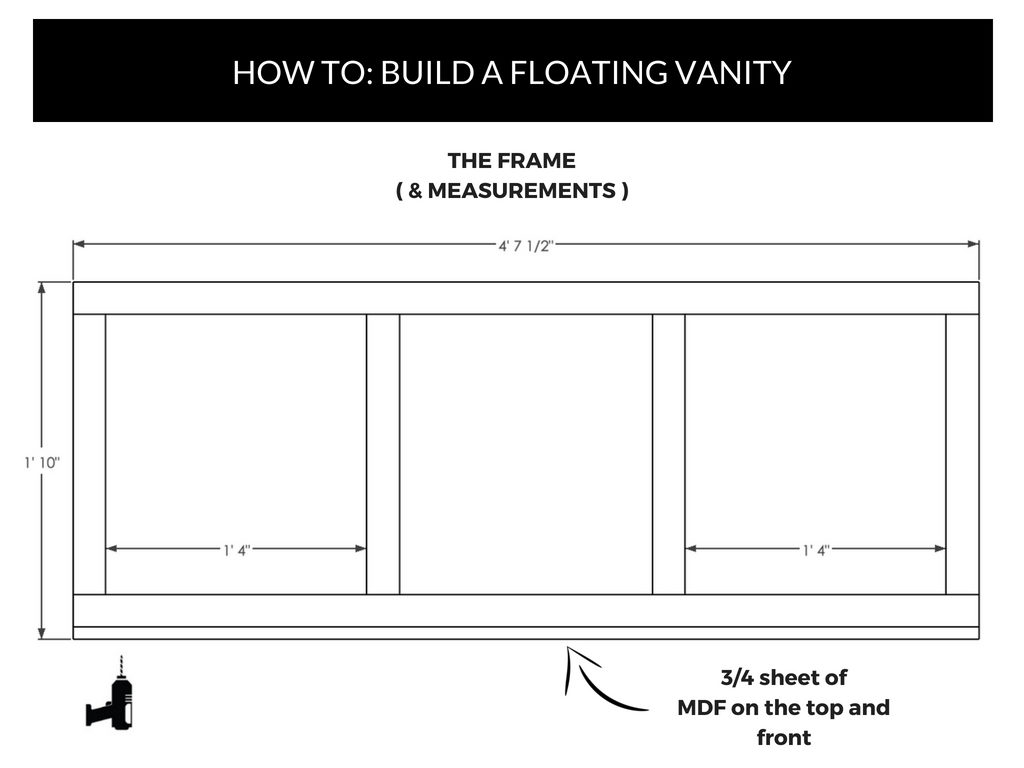
Just keep in mind that you will need a 3/4″ piece of MDF on the top AND front – so take that width into account when you are spacing out your 2 by 4’s if you want it to be exactly 22″ deep. Fix it to the wall at your preferred height (ours is 34″ off the floor). Secure the MDF in place so you are ready for the next step, which is to cut out your hole for the sink’s plumbing. (FYI!! Our front piece of MDF goes slightly past the interior framing to hide it a bit better!!)
Another note – you will need some wood filler for the line where the two pieces of MDF meet as well as all your nails holes to create a nice smooth surface.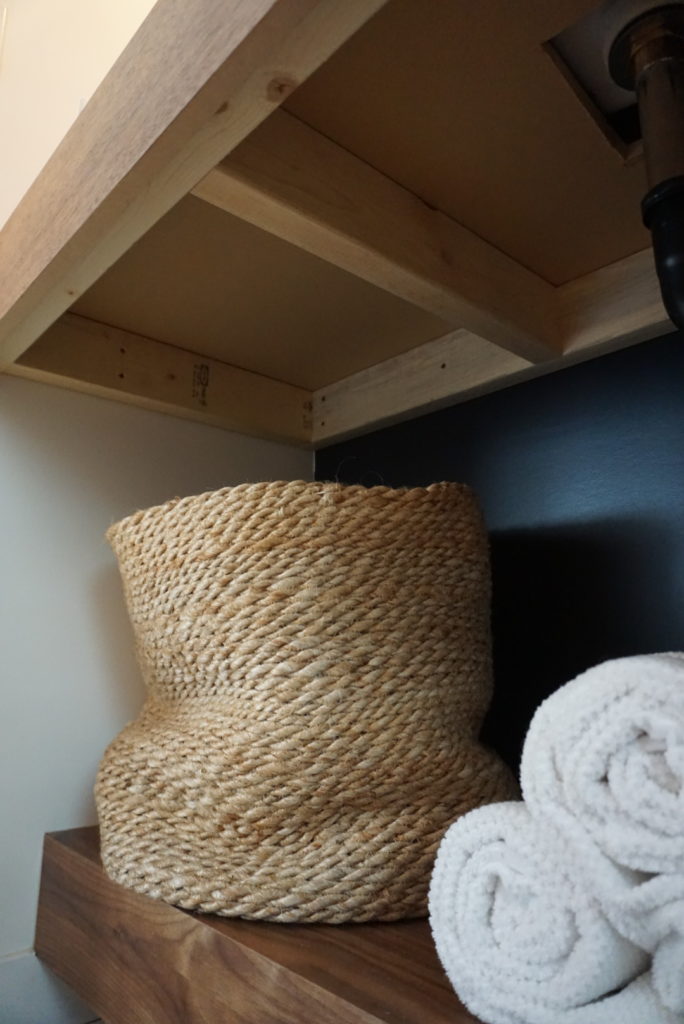
Then – get your veneer!
We went with a walnut veneer from our local Windsor Plywood and also picked up some contact cement, two mini rollers and some lacquer. You will want to take your veneer and pre cut the tops and fronts, marking the corners so you know exactly how to place it. You can always leave a bit extra and trim it with an exacto after it’s installed.
When it comes to the contact cement follow the directions and make sure you cover both the backside of the veneer and the MDF with the mini roller…let it get tacky before securing them together. You only get one shot at this so we would suggest starting on one side and working your way across, using the other clean mini roller to push it down and smooth it out. Don’t worry about going too fast! Then let it sit for however long your contact cement says to.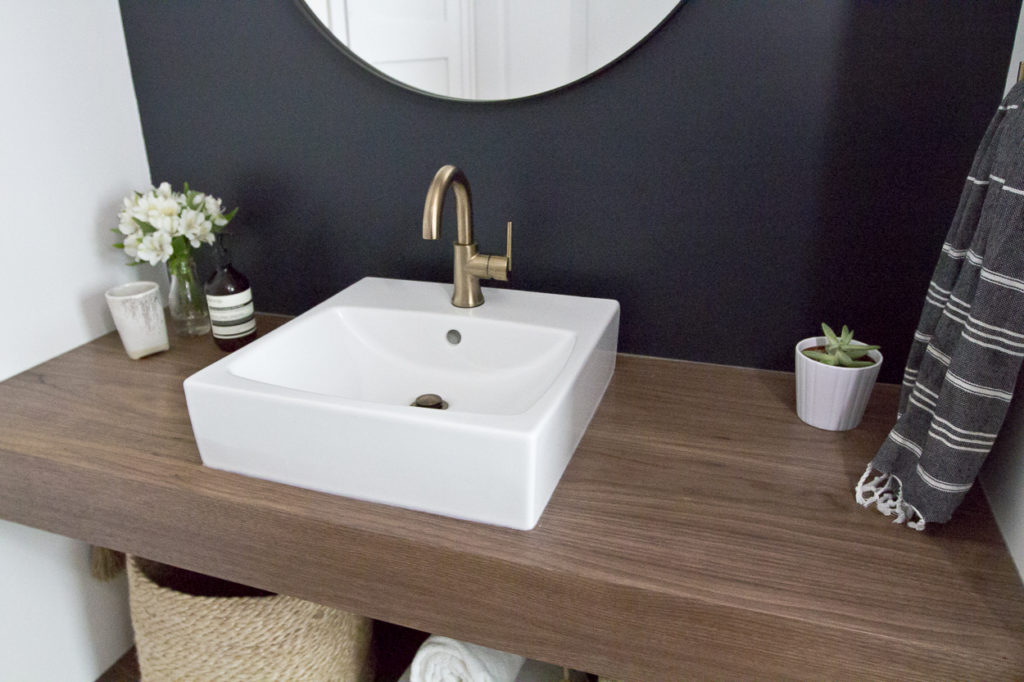
Finally – the finishing details
Once your veneer has set and is definitely NOT going anywhere, you can seal it with your favourite wood lacquer. To be honest, I don’t remember which one in particular we used. After this sets, install the sink (ours is from Ikea) and then silicone around all the edges of the sink and where the vanity meets the walls. Remember, your plumbing parts will all be exposed so think about what finish you are choosing (we did black to blend into our feature wall a bit better, though you can barely see them).
In terms of wear, it’s been nearly two years and it still looks brand new. We do make sure to wipe up water droplets and we never use any harsh chemicals to clean it. In the event it does start to look worn, you can sand it gently and re-lacquer.
And there you have it – your DIY floating vanity!! If you have any questions, please don’t hesitate to ask!! If you want to shop this space, head here!